|
|
|
|
Ken Cottingham - Lotus Europa TC |
|
|
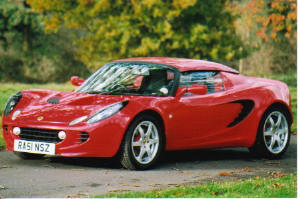
Part 1 - rebuild from the ground up, novice view and experience. ‘You like Lotus then’ he said, looking at
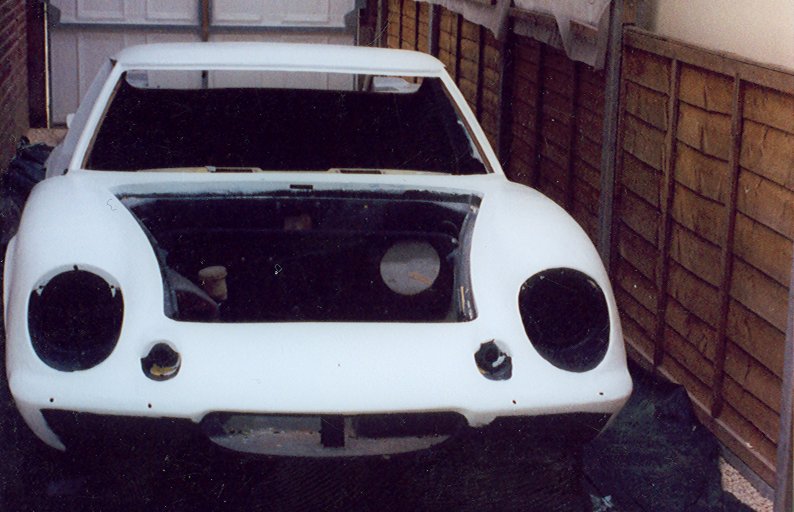
my ‘baby’, a Lotus Elise, ‘where did you ge About an hour or so later and a lot of jawing I was the proud owner of a Lotus Europa Twin Cam, in need of a complete rebuild not having been on the road for over 20 years, a nice little project I thought, can’t be any more difficult than designing and building the hardtop for the Elise. Also, I thought, didn’t Dick Van Dyke rebuild Chitty Chitty Bang Bang from the ground up in a little over 10 minutes? I didn’t have the cowl over the fireplace, but did have some chopped strand mat and resin so repairs would be reasonably easy and some people say that I wield a mighty fine spanner, I always think I wield a mighty fine hammer and metric adjustable myself – but there you go. This is my ‘baby’ after finishing the hardtop in the summer of 2002 and before writing it off in the winter of 2002/3. I had big ideas of marketing the hardtop but Lotus introduced their own version shortly after and somewhat thwarted my plans. Back to the TC and a lot of work to do, but not before the extension to the house was finished as I had orders from ‘she who knows best’. House finished, car started – which surprised us a bit considering the state it was in, would only run on 2 cylinders, but at least it turned over – the unmistakeable wheezy intake of air from the carbs letting us know that life had been partly restored to this sleeping beauty. Here you see the body mostly stripped of paint and original gel coat.
[Richard, you may or may not know, is the owner of Banks Europa and is without doubt the most knowledgeable and helpful man in the UK today with regards anything to do with Europa’s, he has not steered me wrong – ever, here endeth the commercial break - but seriously if you need a part or some advise don’t be afraid to phone Richard – you will then ‘know a man who can’.]
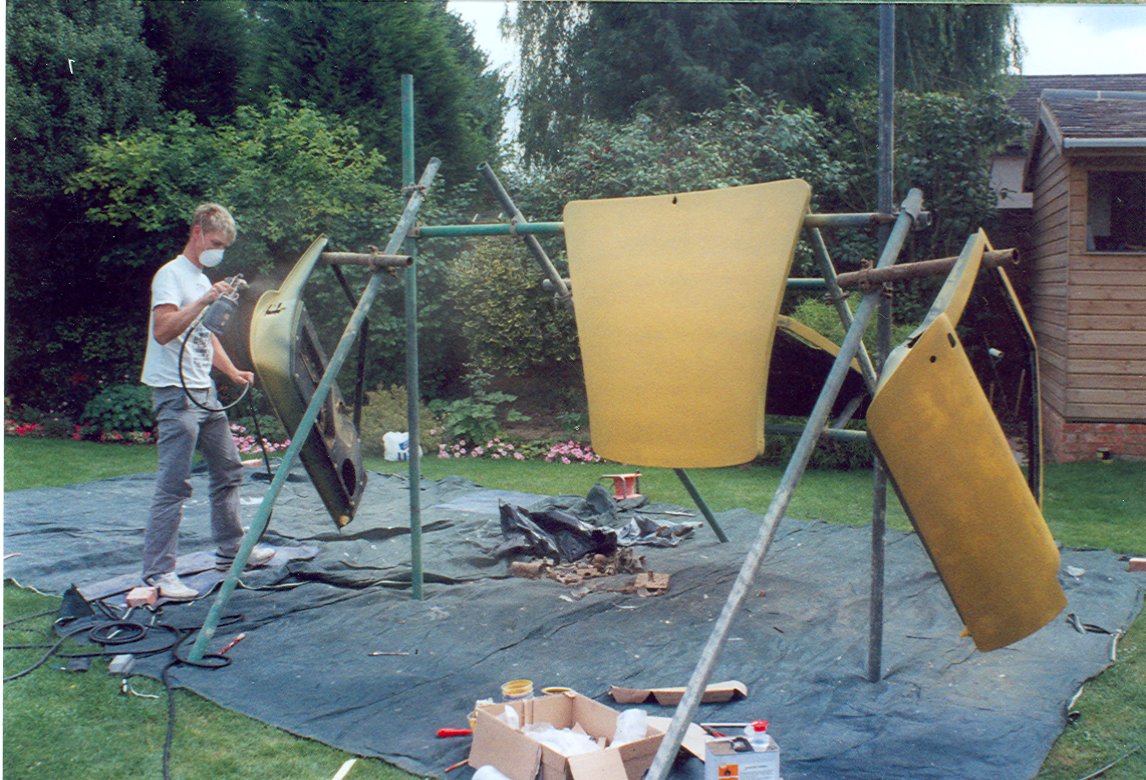
After re gelling the body we literally rendered it with a veneer of body filler, not only to give us something to work with, but also to prevent the glass paper from clogging up with wax from the gell coat. This veneer of filler must be applied to the gell coat before it has hardened so that the filler is sucked into the gell and forms an integral part of the laminate. All that is left to do then is sand it down until it is straight and true, allow about 100 hours for a reasonable job. Apply an etch primmer, 10 – 12 coats of filler primmer, sanding down with 300 grade paper on a sanding block between each coat and you will be ready for the top coat, probably about another 50 man hours or so. All work to date, although very time consuming doesn’t cost much money for materials about £200 - £250 should suffice. ‘She who knows best’ wanted this house for the lovely garden – don’t think she planned on this Lotus plant springing up overnight though! Also please note my sons’ full use of PPE - oven working well in spray booth – it was a nice day.
Photo of body when priming complete, please note wheelie bin being properly utilised and making moving of body so much easier. Whilst preparing the body, the engine had been sent away to be rebored and crank ground, returning with new pistons, bearings, shells, gaskets and seals, all in nice little blue boxes ready to be rebuilt. You can send it all to Richard to do for you, but I know better and decided to do it myself, that’s why after finally shimming up the valves to the correct clearances and putting in the cam for the last time I broke it whilst tightening it up. Be careful if you do it yourself, the cam breaks very easily and snaps like a carrot – especially if you are thick enough to try tightening it when it is incorrectly seated at the front end. A couple of minutes latter and I am on the phone to Richard who says ‘don’t beat yourself up – we’ve all done it, I think I might have a standard one kicking about somewhere’ – not as expensive a lesson as it could have been, but a reminder to take more care in future. Of course, the whole ‘shimming up’ business had to be repeated in order to obtain the correct clearances once again – not 4 hours wasted for the sake of 2 seconds checking the front end – surely not. Engine rebuilds can be very costly, especially if you are trying to extract more horses than Harry Mundy, the designer of the Lotus Twin Can engine, envisaged, but my DIY rebuild cost about £1,100 and more than a few cross words with myself. The uninitiated might think that all people dealing with the twin cam are mad, they might be right, as legend has it that right from the start Harry was offered £1,000 or £1 per engine built from Colin Chapman to design the engine and Harry took the £1,000, only to see 35,000 engines built! Between rebuilding the engine and kicking
myself we also prepared the chassis ready to take the engine once more.
This involved removing every nut and bolt, alot with the aid of the
grinder and checking every part for serviceability. To be honest most
parts were well beyond their expected life span and so new parts were
ordered, all brake pipes, callipers, discs, shoes, suspension, bearings,
steering rack, transfer pipes and heater pipes were replaced after
grinding the chassis back to bare metal and repainting. This part of the
operation was more expensive than I had hoped and cost in the region of
£2,200, plus wheel refurbishment and new tyres at about £600. I obviously
had not learnt my lesson on the engine rebuild and so continued to rebuild
the rear hub and bearings about 6 times before finally getting it right,
once even forgetting to put the back plate for the brake drum on before
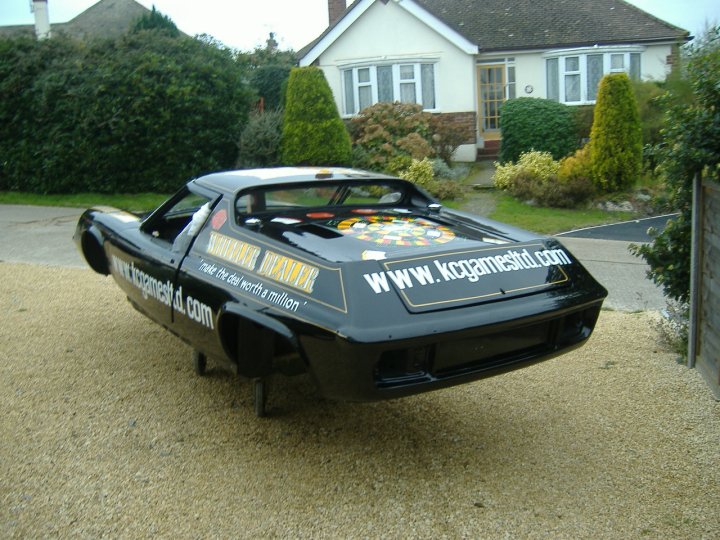
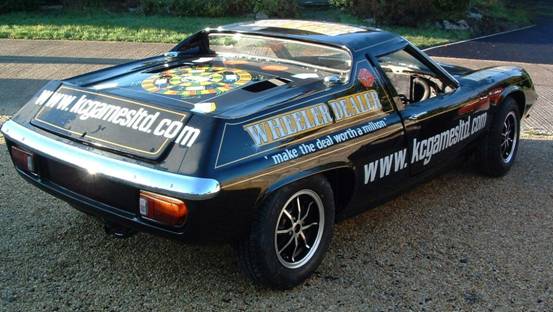
pushing the drive shaft through – thick enough! So far we have spent 4 months on the rebuild, which is not bad considering we have day jobs to contend with and a board game to promote, which incidentally is the main reason for the rebuild. The Europa will be used for advertising purposes and has been skillfully sign written to represent the board and box of ‘Wheeler Dealer®’. Below photo of body as of 23/11/05
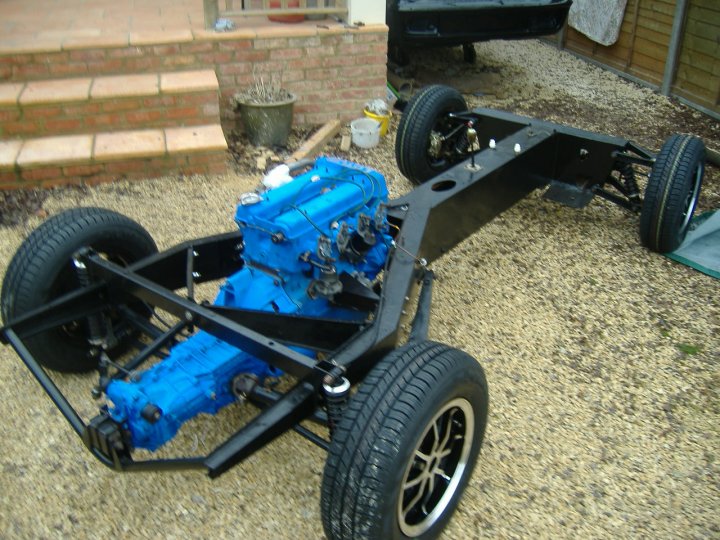
The car will be finished, hopefully before Easter 2006, when I hope to complete this report and update it, in the mean time please visit our website www.kcgamesltd.com Below photo of body on chassis 5/12/05
|
|
 t
the hardtop?’ - ‘My son and I made it’ I said.
t
the hardtop?’ - ‘My son and I made it’ I said.